Frigate NVR
The goal with a Network Video Recorder (NVR) is to free yourself from cloud subscriptions for security cameras. You can (and probably should) run a standalone NVR, but in this guide we'll setup Frigate NVR as a Home Assistant Add-On.
Equipment
To run an NVR alongside Home Assistant you will likely need more CPU power than a Raspberry Pi provides, but most mini PCs should have enough. You can always try it out and find out.
If you plan to use any detection features at all (object tracking, notifications for specific objects) then you will need some sort of hardware acceleration. The Google Coral USB Accelerator device is recommended and is what we'll cover in this guide.
The Frigate recommended hardware guide has more details on both hardware acceleration and CPU recommendations.
Cameras
See list of cameras I've tested at the bottom
You will need cameras that support RTSP and optionally ONVIF. ONVIF is needed for PTC cameras if you want Frigate to be able to control their movement. You also ideally want cameras that can output 2 streams, 1 high and 1 low resolution. High resolution will be used for viewing and the lower resolution for detection tasks.
In this guide I will be using a Tapo C210 camera which can sometimes be found on sale under $20 and supports Pan & Tilt as well as 2K resolution. Tapo cameras support RTSP and ONVIF as well as 2 different quality streams. Unfortunately they also require the Tapo app to perform the initial setup. I will be searching for other cameras that can be used entirely offline in the future and update this guide.
Setup Cameras
The first step is to setup your cameras and enable RTSP. This will vary based on the brand.
- Be sure to set a secure random username and password for your cameras when enabling RTSP
- In your router, reserve the camera's IP address so that it won't change on you. Do not expose the camera to the internet.
- Test your camera's RTSP stream in something like VLC. The exact string will differ based on the brand, but common examples are:
- Tapo:
rtsp://username:password192.168.0.101:554/stream1
- Using
stream2will load the low quality 360p or 720p stream.
- Using
- Tapo:
- Make sure your RTSP stream is working before moving forward
Install Frigate
- In HA go to Settings > Add-Ons > Add-On Store
- In the upper right click the 3 dots, select Repositories.
- Enter
https://github.com/blakeblackshear/frigate-hass-addonsand click Add
- Enter
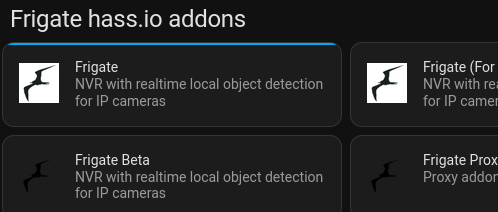
- Now under the Frigate haas.io addons section, select Frigate and click Install
-

- Frigate (Full Access) is another option that can be used if the regular Frigate is not able to properly connect to your devices. It is not recommended unless absolutely needed since it has unrestricted access to your computer. Install the regular Frigate for now and you can always install Full Access later without requiring any additional configuration. Unfortunately they are not clear about exactly what reasons the Full Access version may be needed for.
-
- Enable the Start on boot, Watchdog, and Show in sidebar options.
- Click Start to start Frigate
Add-On Configuration
We now need to update the configuration file for Frigate to tell it about any cameras. To do that you need a way to upload or edit files in Home Assistant. If you have a favorite way, use that. For this demo I will use the File Editor built into Frigate itself.
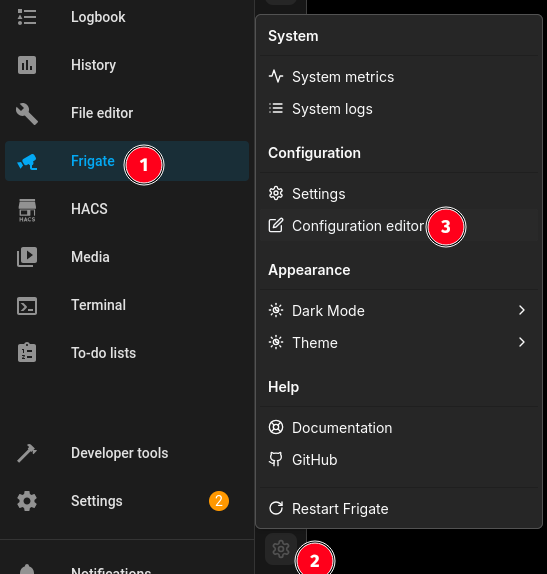
- From the Frigate menu option, click the gear icon at the bottom of the page and then select Configuration editor
-
- The default Frigate config file will be displayed in YAML format. We need to add our first camera to it.
- Under the cameras: section lets add our camera:
Expand to see frigate.yaml
Keep any code above and below the cameras section that is already in the config file
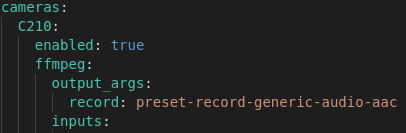
cameras:
  C210: # <------ Name your camera
    enabled: true
    ffmpeg:
      inputs:
        - path: rtsp://username:password@192.168.0.101:554/stream1 # The High Quality stream you want to use for recording
          roles:
            - record
        - path: rtsp://username:password@192.168.0.101:554/stream2 # The Lower Quality stream you want to use for detection
          roles:
            - detect
    detect:
      enabled: false # Disable until you have a working camera feed and hardware acceleration
      width: 1280 # The resolution of the detection camera feed.
      height: 720
      fps: 5 # This can be raised later if we have the processing power
    record:
      enabled: false
      retain:
        days: 7 # The number of days a recording will be kept for after a motion is detected
        mode: motion
      events:
        retain:
          default: 30 # The event data will be kept for 1 day. After this period, the event data will be automatically deleted.
          mode: motion
# Leave out this section if camera is not PTZ or does not support ONVIF
    onvif:
      host: 192.168.0.101
      port: 2020 # Port may differ for your camera brand!
      user: username
      password: password
      autotracking:
        enabled: false # Disable until you have hardware acceleration
        calibrate_on_startup: true
        zooming: disabled # Can enable if camera supports Zoom
        track:
          - person

    objects:
      track:
        - person
        - car
- Click the Save & Restart button
-
- If Frigate fails to restart due to an error in your configuration file, in HA go to: Settings > Add-Ons > Frigate > Log to see the error message. Be very careful about your file formatting and spacing. Indentation and whitespaces matter in YML files.
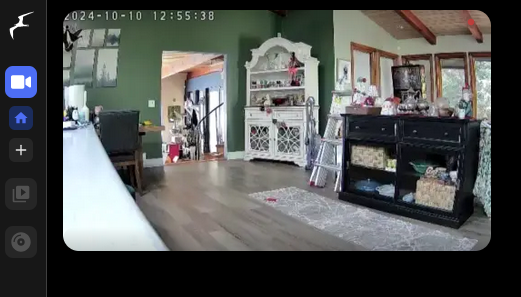
- Going back to Frigate from the HA side menu, you should now see your camera feed. Clicking the camera feed opens it in full view and If you enabled ONVIF will also show your PTZ controls
-

Additional Setup and usage instructions are coming soon. In the meantime go ahead and setup more cameras and play around with Frigate. You can try enabling detection in your Frigate config file, but without Hardware acceleration it may bring everything to a grinding halt.
Using go2rtc - Viewing High Quality Streams
Wait, you setup the high quality camera stream in your Frigate config, but when viewing it from the web UI you're seeing a low resolution stream!?
While this setup is optional, it will allow for viewing higher quality streams in the Frigate UI and also reduce the number of direct concurrent connections to your cameras. This also allows for more connection types to cameras than just RTSP. You can see the full list of supported connection types here.
Open your frigate.yaml file again for some editing. We are going to add a new main section titled go2rtc: and also add the cameras to this section, then we will update the cameras: section to point to this stream instead of directly to the camera.
Expand to see frigate.yaml
Add the following section right above the existing cameras: section. If using rtsp, you can copy the rtsp connection string from the cameras section to this section.
go2rtc:
  streams:
    C210: # <-- Name the camera, use the same name as in the cameras section
      - rtsp://username:password@192.168.0.101:554/stream1 # <-- stream which supports video & aac audio
      - "ffmpeg:C210#audio=opus" # <-- Optional, This creates a copy of the stream which transcodes audio to opus for webrtc support
    C210_sub: # <-- Optional low-quality substream
      - rtsp://username:password@192.168.0.101:554/stream2 # <-- Low Quality stream which supports video & aac audio
      - "ffmpeg:C210_sub#audio=aac" # <-- Optional if audio is desired in aac format for substream
If you have issues with the rtsp connection string, you can try adding ffmpeg: to the start of it. This supports more encoding types, but does cause the camera connection to be slower. Example: ffmpeg:rtsp://username:password@192.168.0.101:554/stream1
Save the changes to this file and restart Frigate to test this stream and see if it works.
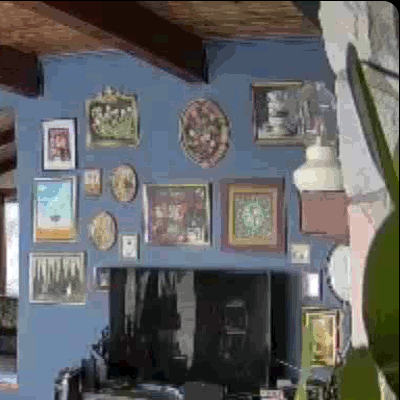
Below is an example of quality difference when viewed in the Frigate UI before and after enabling go2rtc. This is just one corner of the camera view and there is quality lost from converting this to a gif for display here, but it still makes the quality difference clear.
You must now change the path: element for each camera under the cameras: section to point to the go2rtc stream instead of directly to the camera. This will again reduce the number of connections made directly to the camera. No credentials need to be specified here. Example: - path: rtsp://127.0.0.1:8554/C210
You should also add the following setting under the path to tell Frigate to always use this re-stream coming from go2rtc: input_args: preset-rtsp-restream
More go2rtc docs: https://docs.frigate.video/guides/configuring_go2rtc/
Notifications & MQTT Integration
Now that Frigate is installed and working, you'll need to install the Frigate HACS integration to integrate it with the rest of Home Assistant. If you have not yet enabled HACS, see here first. This also assumes you have already installed the MQTT Add-On and Integration. If not, see here.
- From HACS, search Frigate
- Download Frigate and Frigate Card. Then restart Home Assistant
-
- In HA, go to Settings > Devices & Services > Add Integration > Frigate
- Leave the default URL in place (
http://ccab4aaf-frigate:5000) and click Submit- The default URL works if you've install Frigate as an Add-On in Home Assistant. If you have installed Frigate elsewhere, you need to enter the URL/IP to access it here.
- Your configured camera(s) should pop up so you can add them to an Area.
- Go to Settings > Add-ons > Mosquitto broker > Configuration
- If you haven't setup a user here yet, add one using this format in the Logins field
- Setting whatever username and password you want. This user is only for applications to access MQTT and Frigate requires a user to exist, it cannot use MQTT unauthenticated like some other services can.
-
- username: mqtt-user password: mqtt-pwd - Click Save to save your new MQTT user
- Open your
frigate.yamlfile again for more editing. We are going to edit the section titledmqtt:so that Frigate can access MQTT. If the mqtt section is missing you can add it.
Expand to see frigate.yaml
The mqtt section is usually at the very top of the frigate.yml file and is disabled by default. Enable it as shown here and add your Home Assistant server's local IP address as well as the user and password you just setup in the MQTT Mosquitto broker config.
mqtt:
  enabled: true
  host: 192.168.1.100 # <-- Local IP of your HA server. Does not work with localhost/
  port: 1883
  user: mqtt-user
password: mqtt-pwd- Save the changes to this file and restart the Frigate Add-on
- Go to Settings > Devices & Services > Frigate, and select one of your cameras.
- You should now see a bunch of Sensors available.
- If MQTT is not working, these sensors will show unavailable. If that's the case, check the Frigate logs (Settings > Add-Ons > Frigate > Log) and search for anything referencing
mqtt. Also make sure Frigate was restarted after the latest changes. Make sure the host value you entered in frigate.yml is correct and is the IP address and not something likelocalhostorhomeassistant.localas those won't work.
- If MQTT is not working, these sensors will show unavailable. If that's the case, check the Frigate logs (Settings > Add-Ons > Frigate > Log) and search for anything referencing
- You should now see a bunch of Sensors available.
- Now you need to import this blueprint which will allow you to finally setup notifications:
- To setup a notification rule after importing this blueprint: Go to Settings > Automations & Scenes > Create Automation > Frigate Notifications
- As a basic notification example, Select a camera and a device to be notified.
- If not devices show up, make sure you've installed the Home Assistant phone app and logged in with it
- If your device shows up twice, it's probably the last one listed, but you may need to try and come back and change it if it doesn't work.
- For Base URL, you can start by leaving it blank. A value of
homeassistant://will open links in the app but not work for TVs. Setting your public home assistant URL will open links in a browser, but will work for TVs. - No other fields are required. You can come back later to customize your notifications further or setup additional notifications for other devices/groups.
- Click Save and name your notification. It is now active. You can find it in the Settings > Automations & scenes page.
- Try walking in front or your camera and see if it triggers.
- If it does not trigger there are a few things to check:
- Check frigate.yml and make sure you have the
detect:element under your camera enabled. - Check the Frigate Review page to see if it's detecting events. If it's not, it's a camera config issue.
- Open your camera in Frigate and make sure Detection is enabled there. This option seems to work separately from the frigate.yml setting, and both need to be enabled.
- Make sure the correct device is selected in the Automation you just setup
- Check frigate.yml and make sure you have the
- If it does not trigger there are a few things to check:
Motion Tracking
Coming Soon, detailed instructions on setting up motion tracking and other features
Cameras Tested
| Camera Brand |
Model |
Features |
Substream |
Works? |
Notes |
| Tapo | Cheap |
Internet Required for Setup Not all models have same substream quality Muting audio in Tapo app will Mute the RTSP steam audio in Frigate |
|||
| Tapo | C210 |
2k, Pan & Tilt |
360P | ✓ |
Internet Required for Setup P&T work in Frigate w/ manual controls but not automatic tracking.
Note: some other Tapo models have a better 720p substream. |
| Tapo |
C110 / C120 |
2k, Cheap |
360P | ✓ |
Internet Required for Setup. C120 has better performance and clarity. I recommend it.
Note: some other Tapo models have a better 720p substream. |
| Reolink | Cheap |
360P |
✓ |
Substream quality lower than ideal for object detection. Some models may have higher substream resolution. RTSP sometimes unstable Untested, but supports RTMP and may be more reliable |
|
| Eufy | X |
X |
No longer supports RTSP. Eufy pulled RTSP from cameras previously supporting it via a firmware update. Some models may still support RTSP, but it's a gamble. |
||
| Wyze |
Cheap |
360P |
X |
No RTSP Support. Hacky workaround available but it's not super reliable |
What is a substream?
A sub-stream is a secondary camera stream at a lower resolution. Without a substream, object detection needs to happen on the main stream, which can take a lot of resources of it is high quality. However, if the substream resolution is too low then it's not very useful. Usually 720p is a good middle ground. If you have the resources to perform detection on the full resolution stream, go for it!
Common Issues
No Audio
Getting audio working can sometimes be a bit of Trial an Error. The latest versions of Frigate improve this.
- Try removing the ffmpeg audio from the got2rtc setting entirely
- Try Adding/Removing the ffmpeg output_args under the camera as well:
-

- Generally if you enable ffmpeg audio=aac in to got2rtc settings you should enable this under the camera as well. And when disabled/removed from go2rtc, remove it from the camera settings too.
-
Devices Missing in Settings > Devices & Services > Frigate
The Frigate Devices don't update automatically until Home Assistant has been restarted. The most reliable way to get this updated is:
- Restart Frigate
- Restart Home Assistant
If you don't restart just Frigate first, then it won't pick up the Frigate config changes in time to update the Device list.
Changing Camera Names
Changing camera names in Frigate is a bit difficult as you need to update all the references manually. Note, the connection to the Frigate Camera Devices in Home Assistant will break and new devices will be created. These are the steps you need to take:
- Update ALL references to the camera name (and any sub-stream names) in your frigate.yml file
- Restart Frigate and wait for everything to load back up
- Verify in the Frigate UI that all cameras are loading and the settings show the new camera names
- Restart Home Assistant
- Yes, do this
- After Home Assistant is back up, go to: Settings > Devices & Services > Frigate
- Verify that all the new names are displaying and the old ones are gone
- Go to Settings > Automations & scenes
- Manually update (and Save) every automation or scene that references your cameras so reference the new name